A Recall is a type of flag recorded against a patient's record, designed to inform practitioner s and/or practice staff of when the patient is due to return to the practice, usually so that some clinical procedure can be performed, such as an annual health check, or a pap test. Recalls are generally created by the practitioner during the patient's consult, as explained following.
Recall notifications (sent to patients) are generally managed by the Practice Manager.
The instructions below explain how to create a recall via a patient's record. You can also initiate a recall by first generating a report of eligible patients.
Generate a Recall via the Patient's Record
1. Within the patient's record,
locate and click  to call the Consult
panel.
to call the Consult
panel.
2. Locate
and click  located at the top of the Consult panel. The Recall
panel opens, and a new recall is started for you.
located at the top of the Consult panel. The Recall
panel opens, and a new recall is started for you.

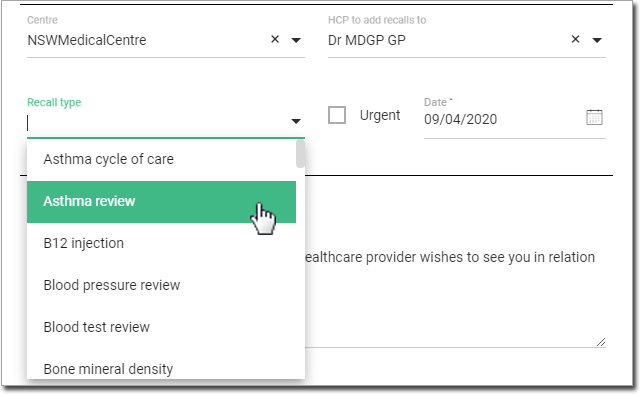
3. Select
a reason for the recall from the drop-down list at the top of
the panel.

4. (optional) Tick the Urgent check box if the patient must be notified urgently.
o The title changes to read "Urgent Recall".
o The recall date defaults to the current date, and cannot be modified.

5. If it is not an urgent recall, indicate the date on which the patient is to be notified of the recall.
o The
default date depends on the type of recall reason selected.
o The
date can be changed manually, or selected from the calendar.

6. Recalls
can be created/assigned to any Health Care Professional. Click
on the “HCP to add recalls to “ drop down . Users with practitioner related
permissions would be displayed . Choose the practitioner to assign the
recall to. By default, the user currently logged in is shown in
this drop-down.

7. Enter any information in the Comment field as desired.
8. Enter any information in the Medical Note field as desired.
9. Click
 to save the recall to the
patient’s Timeline.
to save the recall to the
patient’s Timeline.
o Save and Close are the only options available when first creating a recall.
o To Complete, Defer, or Remove a recall, it must be accessed via the patient's Timeline or via the Message Centre.

Generate a Recall by Searching for Patients
1. Conduct
a search for patients via the Patient
Reports module. The follow image displays an example we have
generated.
Note: Recalls cannot be generated for deceased patients.
However, should you wish to see such patients in the search results
regardless, tick the Include
Deceased Patients check box on this window before
preforming the search.
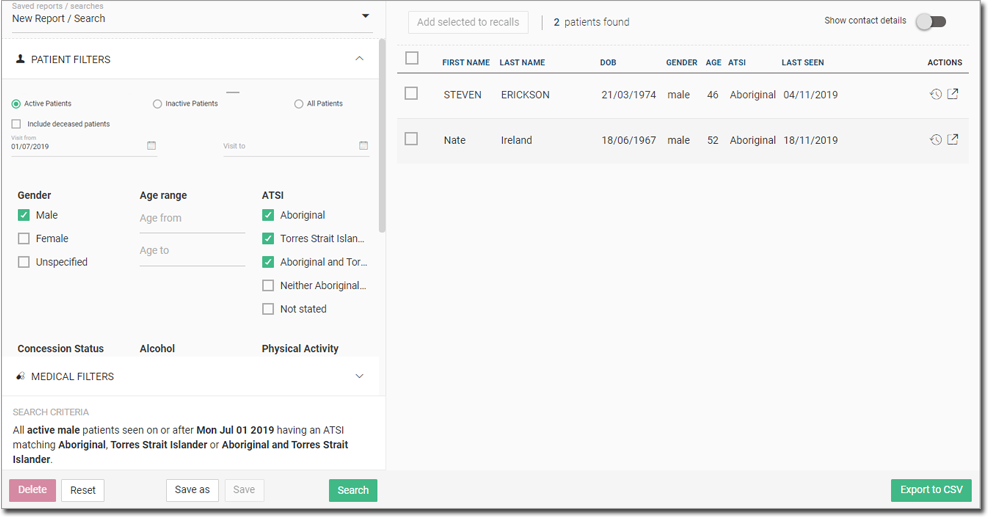
2. Select
one or more patients to recall. In our example we have selected
both patients.

3. Click

o Alternatively,
to create a recall for a single patient, simply click the ![]() icon under the Actions
column against their name.
icon under the Actions
column against their name.
You
are prompted to provide details about the recalls to be generated.
Continue to Step 4 to for more information.

Select the Urgent check box if required.
5. Choose
the Due date option from the calendar if the default due date
is not what is required.
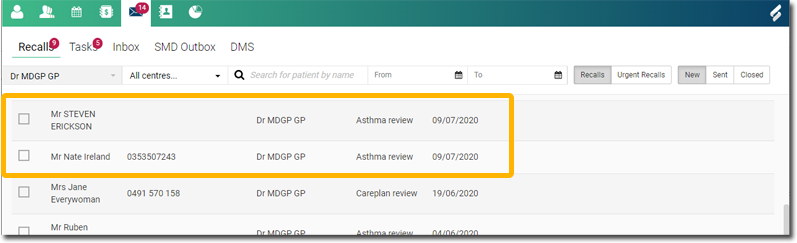
6. Click
 to create the recalls for
all selected patients. These recalls can be accessed in the Message Centre under the
Recalls tab.
to create the recalls for
all selected patients. These recalls can be accessed in the Message Centre under the
Recalls tab.
Recalls in the Patient's Timeline
A clinician can view recalls in the patient’s Timeline.
Select a recall from here to view it in the Recall panel.
- A comment about the recall may
be added at the bottom of the panel by clicking

 Allows you
to indicate successful contact, and record a comment to
indicate that the patient was contacted. If the recall
is recorded as successfully contacted, it is added to
the list of 'contacted recalls' in the Message
Centre.
Allows you
to indicate successful contact, and record a comment to
indicate that the patient was contacted. If the recall
is recorded as successfully contacted, it is added to
the list of 'contacted recalls' in the Message
Centre. Allows you to indicate
unsuccessful contact, and record a comment to indicate
the patient could not be contacted.
Allows you to indicate
unsuccessful contact, and record a comment to indicate
the patient could not be contacted.
|
Delete the recall. You will be prompted to confirm this action. |
|
Keep the recall open, and defer it. The recall remains in the Timeline and in the list of 'new recalls' in the Message Centre. |
|
Indicate that the recall has been made successfully. The recall is removed from the patient’s Timeline and is added to the list of 'contacted recalls' in the Message Centre. |
|
Save any changes to the recall. |


