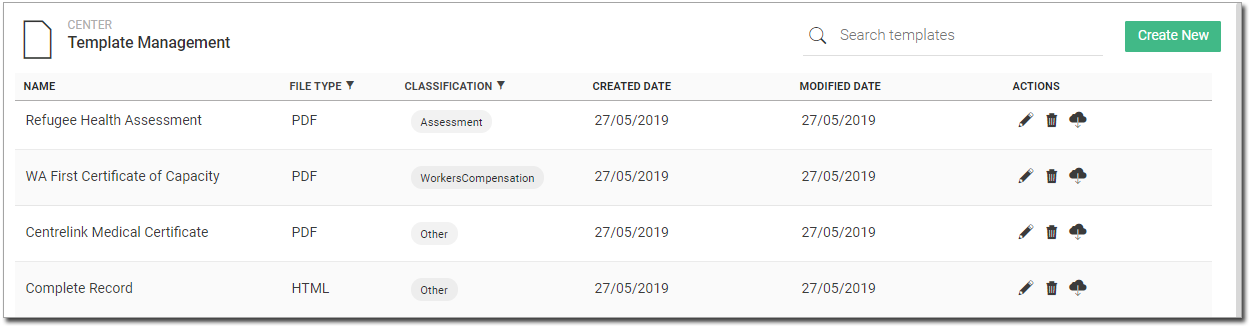
Overview
All templates used in Letter Writer are managed via the Template Management system. From here you can add a new template, edit it or delete it.
1. Locate
and click ![]() at the lower-left.
at the lower-left.
2. Select
the Settings option.
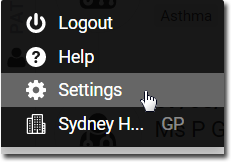
The Settings window appears.
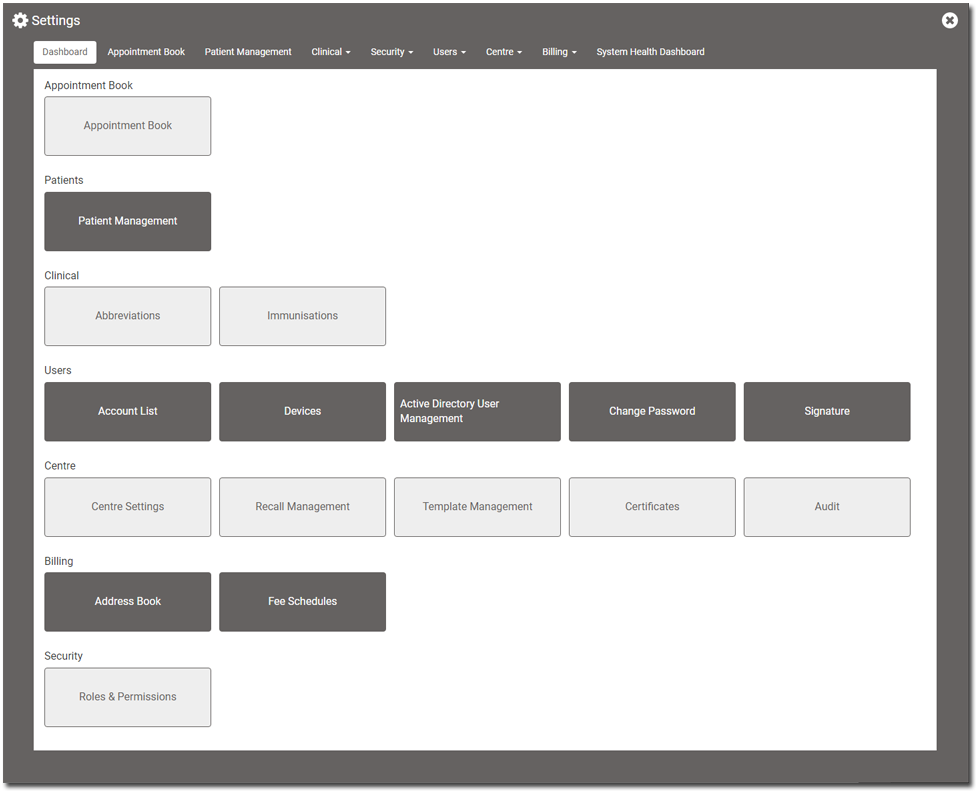
3. Within
the Centre section, click
 The
Template Set-up window
appears.
The
Template Set-up window
appears.
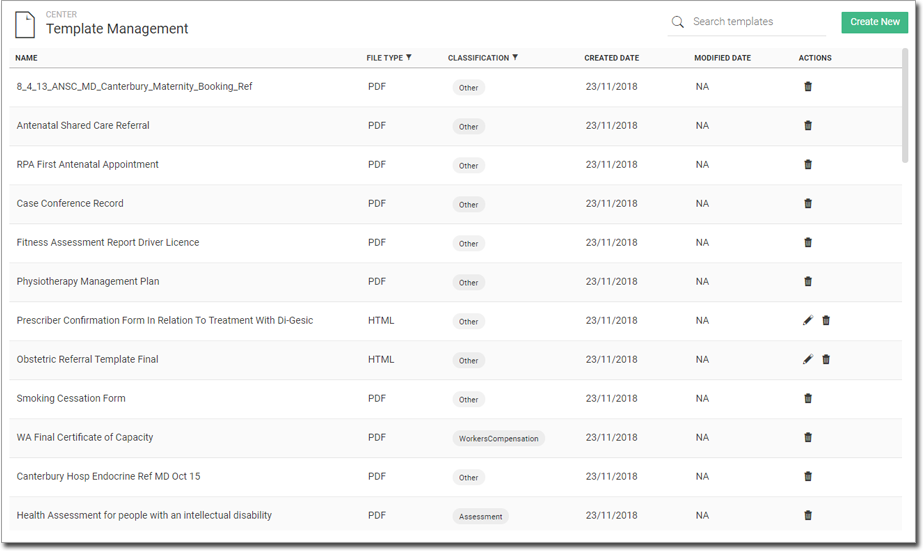
o Click on a column name to change the sort order.
o You can sort and filter files by ascending or descending order on both File types and Classification columns.
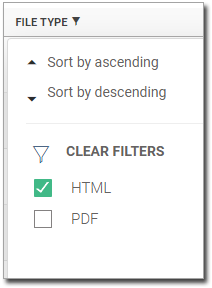
• File Type Filter: Click on the
column name to select HTML and/or PDF. The selected template types
will be displayed.
• Classification Filter: Select
any of the classification type in the drop-down list, and templates
will be displayed based on the selection.
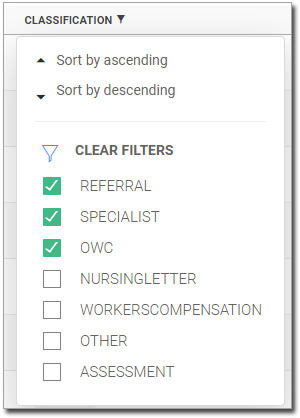
• Search for a template by entering part of its name into the Search Template field.
Create A New Template Using a Blank Template
1. Click
 The Create
Template window opens.
The Create
Template window opens.
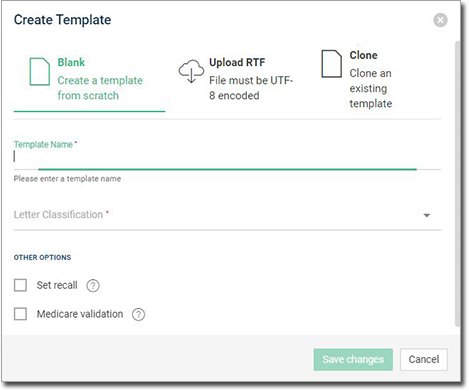
2. Enter a Name for the template.
3. Select a Classification for the new template from the drop-down list.
4. Via
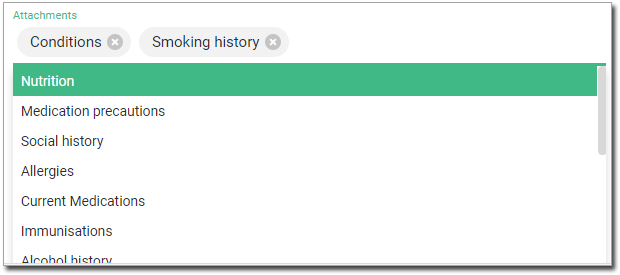
the Attachments section,
indicate whether you want additional data from the patient's record
to be printed with letters based on this template. For example,
we have indicated that we want the patient's Nutrition
and Physical Activity
information to be printed every time we create a new letter based
on this template.
5. (optional) Tick the Set Recall check box to indicate that a Recall will be created for the patient whenever a letter is printed using this template.
o Indicate the Recall period.
o Indicate the Reason for Recall.
6. (optional) Tick the Medicare Validation check box.
o Select an option from the drop-down list.
7. Click
 to save your template settings. You
are shown the template editor, where you start creating your template.
to save your template settings. You
are shown the template editor, where you start creating your template.
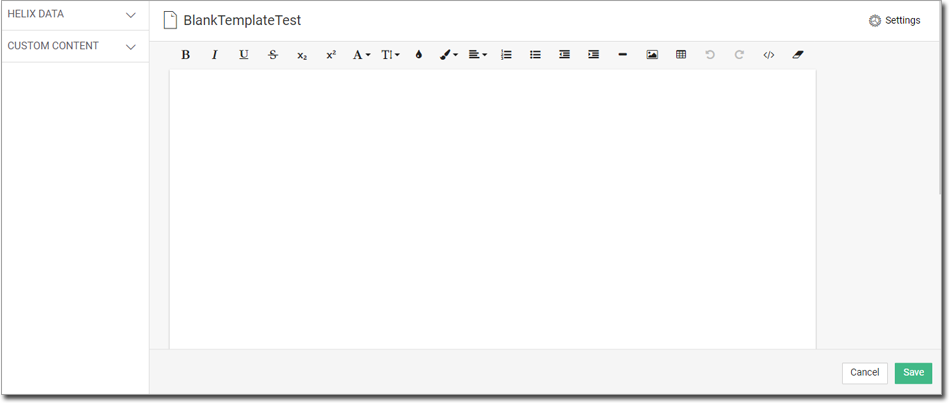
o The
Template Editor has different
formatting options. You can create the template by using different
fonts, styles, alignments and inserting images and tables via
the option present on the top of the letter editor.

• Hover your mouse over each icon to see its function and shortcuts
• You can also insert images and tables into templates.
o Use the Data tool bar located on the left-hand side of the template editor to insert data fields into the template. There are two classifications of fields content; Helix Data and Custom Content.
• Add
data fields to a template to populate your letters with data from
Helix. Drag and drop fields into the template, or double click
on the field name to insert it. For example, to insert the practice
phone number, place your cursor into the template where you want
the field to appear. Then, in the Helix Data section, click on
Centre Demographics, double click on Phone
field to insert it into the template.
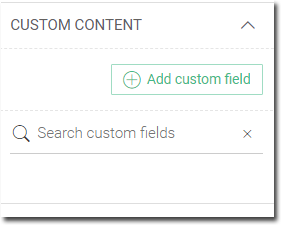
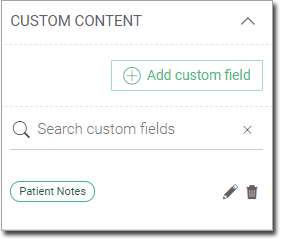
• User-Defined
fields can be added to the template by clicking on the Custom
Content section. You can also edit or delete the fields
accordingly.
For example, to add a free text (Paragraph):
· Click
· Choose
Free Text (Paragraph)
field.
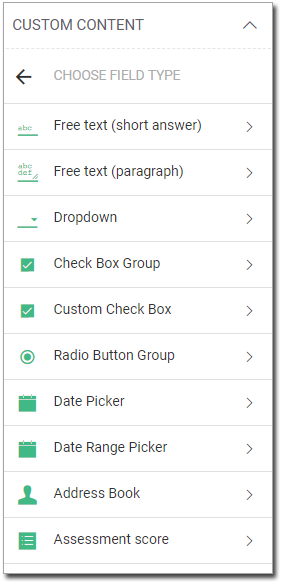
· Fill in the Field name and Field label along with the options for Maximum characters allowed. Hovering over the icon next to the field provides more information about it.
1 Field Name: Must be a unique identifier for the field.
2 Field Label: The name of the
field, as it appears on a completed letter.
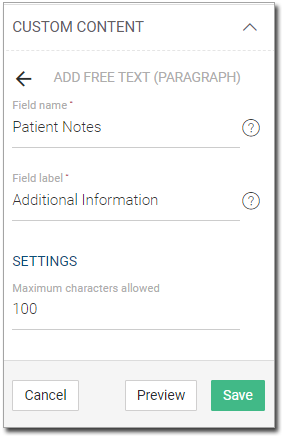
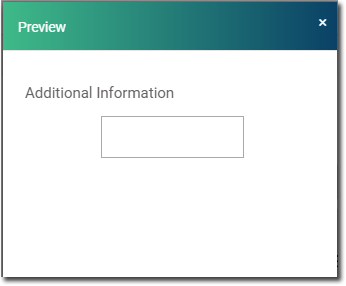
3 Click
Preview to preview the
created field.
4 Click
Save under the custom
fields.
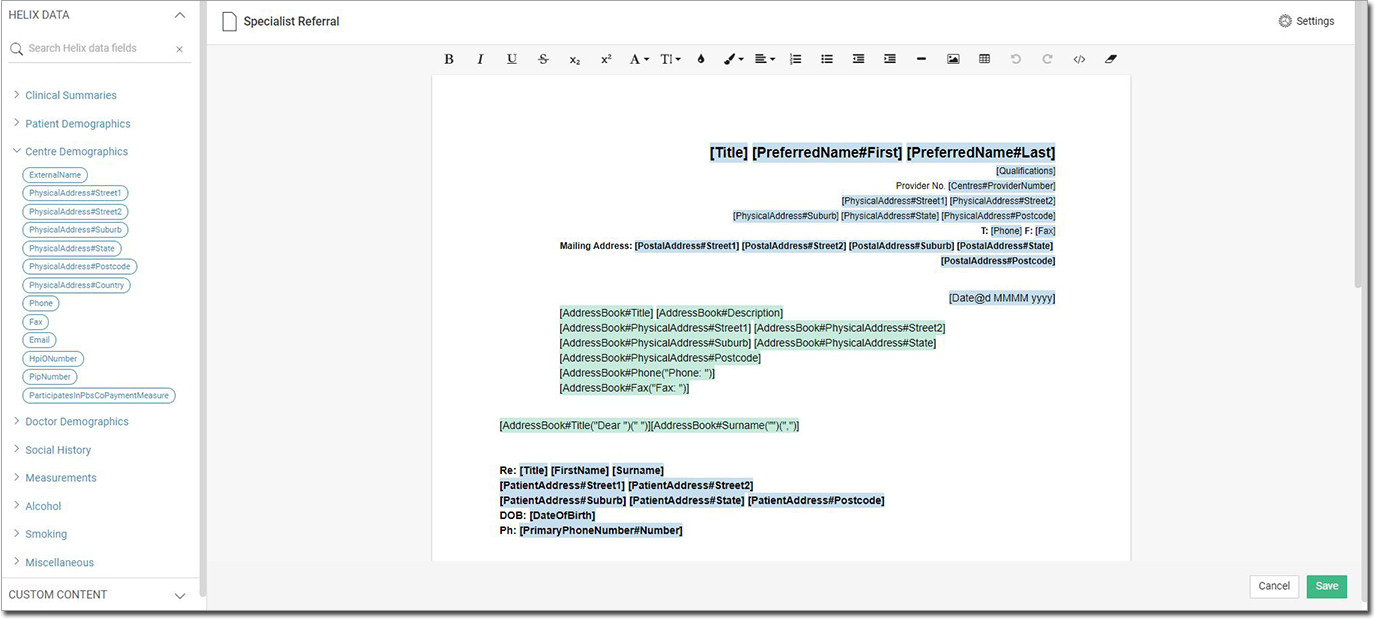
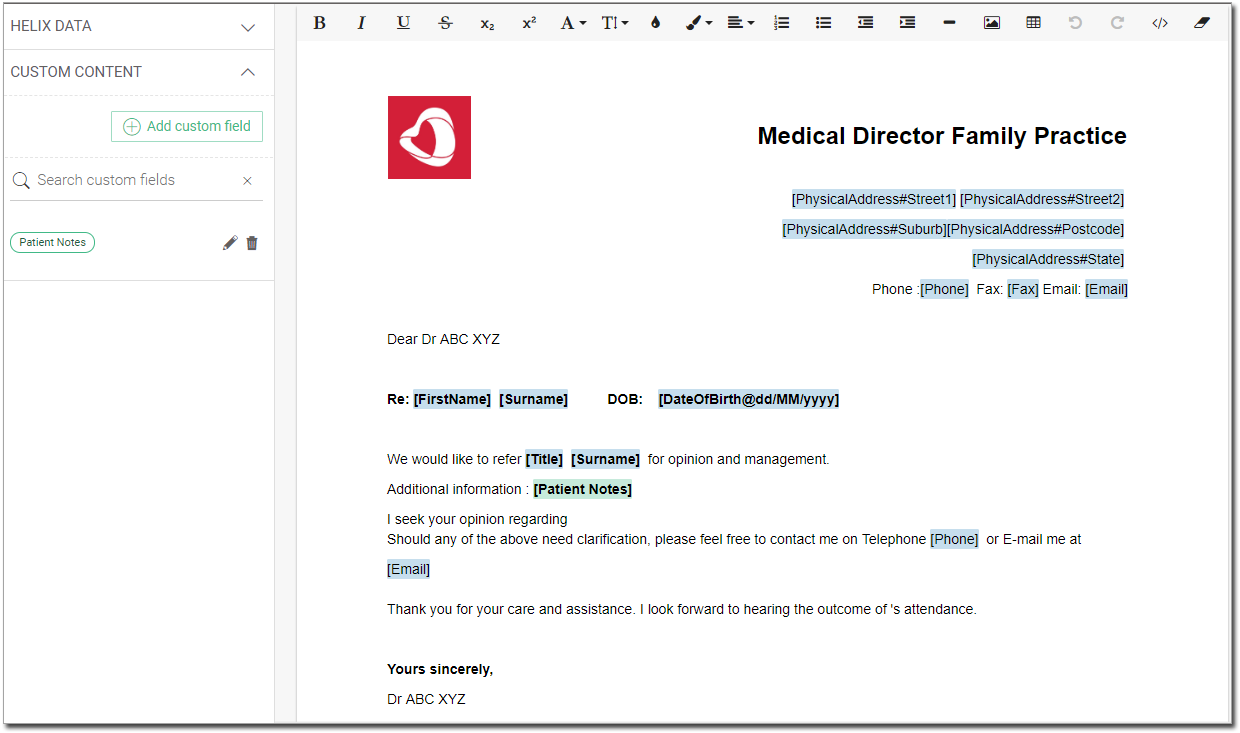
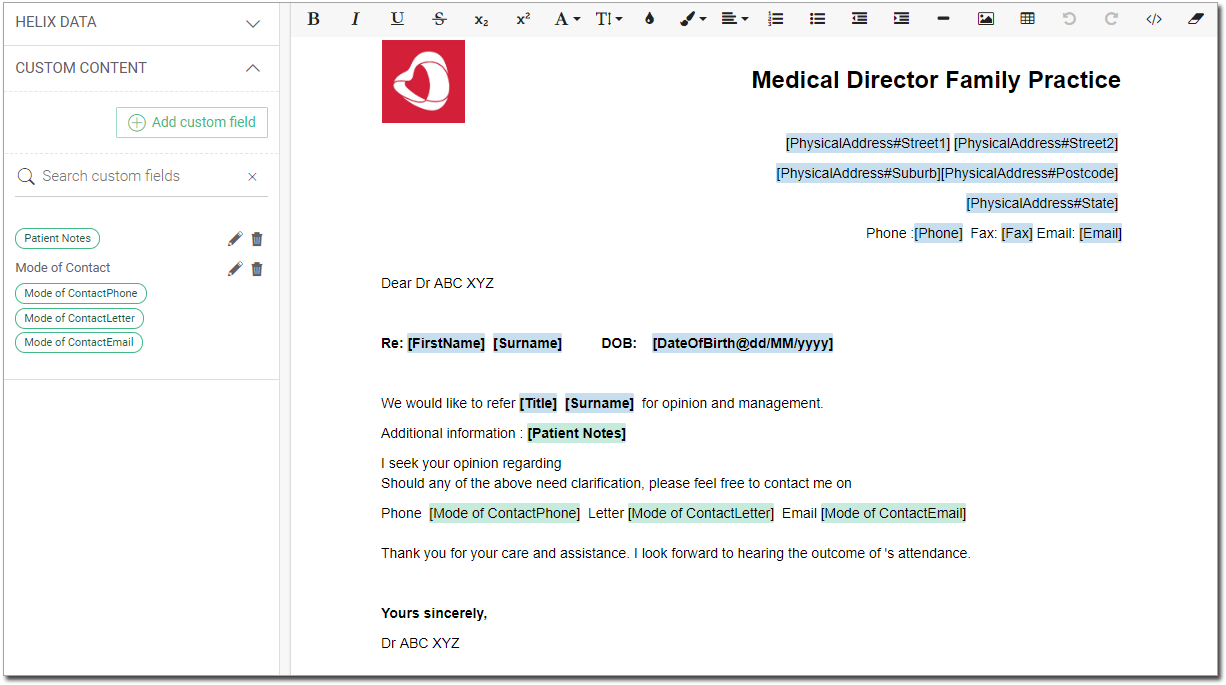
8. After
completing the template with all needed information, click  at the bottom of the window. The Final sample Template
is displayed below.
at the bottom of the window. The Final sample Template
is displayed below.
o Note that the Helix data fields
inserted in to the template are highlighted in Blue,
and the custom fields are highlighted in Green.
Create a New Template by Uploading a File
1. Click
The Create
Template window opens.
Select the Upload RTF
option.
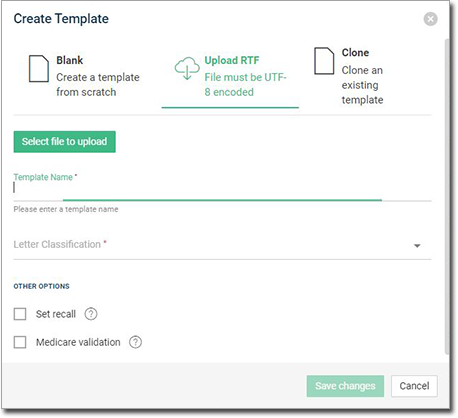
2. Enter all the mandatory information regarding the template.
3. Click Select File to Upload and select the file and save the template.
o Note: supported file formats include HTML, RTF, and JSON files only.
4. The Template editor window opens. You can now edit any information in the template and save it.
o Note : Uploading templates from Medical Director Clinical or any other external templates will not automatically recognise the Helix fields. These fields in the existing template will have to be deleted and entered choosing the data in the Helix data section.
Create a New Template by Cloning an Existing Template
1. Click
The Create
Template window opens. Select the Clone
option.

2. Select one of the templates from Clone from template drop down. Mandatory fields will be populated with text.
3. Click
at the bottom of the page.
The editor opens with the current template to make the changes
for the newly cloned template. Once the changes have been made,
click to save
the new template.
4. After
saving the template, the Template List will be refreshed to show
the new template.

Edit a Template
Edit action is available for HTML file templates only. Edit templates by clicking the edit action button of that particular template.
Click ![]() against the template
you wish to edit. You can
now modify any information on the template be it a text or adding/editing
any fields. In the example below, we will edit
a template by adding a check box group, in order to add the information
of Preferred contact method for the patients in the Letter.
against the template
you wish to edit. You can
now modify any information on the template be it a text or adding/editing
any fields. In the example below, we will edit
a template by adding a check box group, in order to add the information
of Preferred contact method for the patients in the Letter.
1. Click
2. Choose
the Check Box Group custom field option.
3. Enter
the mandatory fields (Field name and Field label).
For our example:
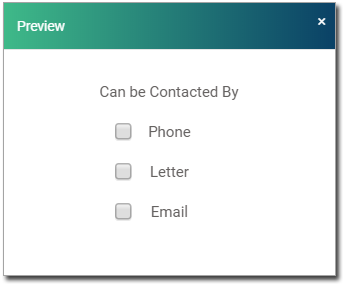
o Field Name: Mode of Contact
o Label: Can be Contacted By
4. You
are able to add multiple options via the Add
button under Options.
Option Name and Label are required fields.
5. Four options are available under Settings:
o Text: If selected, you must also indicate the text that will appear in the letter, depending on whether you select the option or not. For example, you might pose the question "Can the patient be contacted on weekends?". If you tick this question (confirming), the text that might appear in the letter could be something like "This patient can be contacted on weekends." Alternatively, the 'False' text might read "This patient can only be contacted on weekdays."
o Cross: If check box is enabled, a Cross check box will be displayed, or else a blank check box is displayed.
o Tick: If tick box is checked, a Tick check box will be displayed, or else blank check box is displayed.
o Select check box by default:
If selected, a check box will be selected by default.
In our example, we have chosen the Check Box group option as in
the example above.
6. Clicking
the Preview button displays
a preview of the added custom fields.
7. Click Save to save the changes.
o After saving the changes the fields can be used in the template by adding them to it.
o Custom fields are highlighted in
Green.
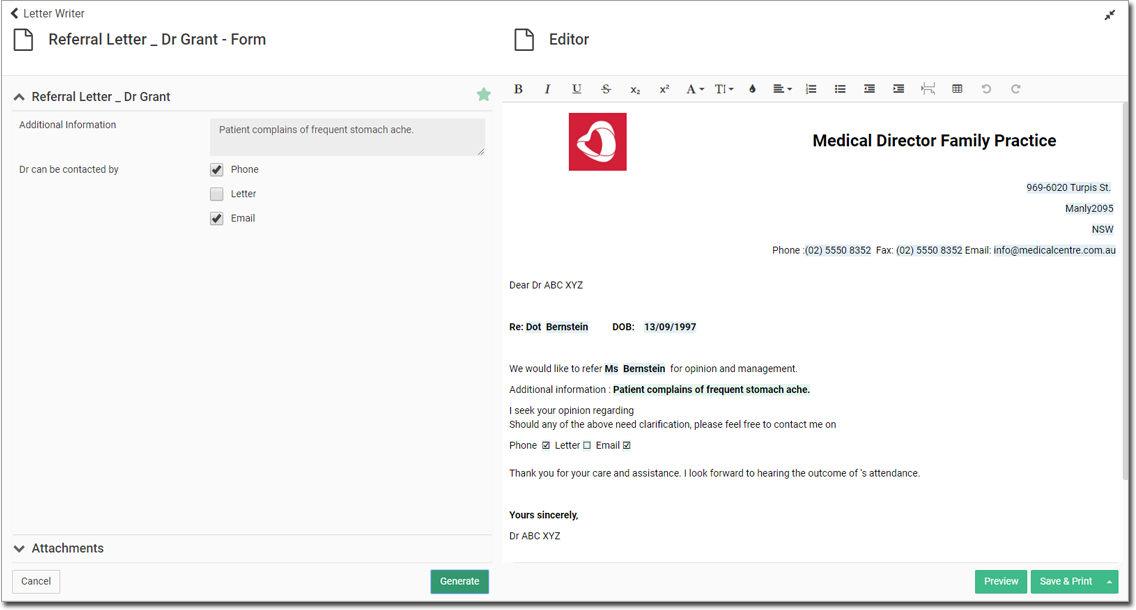
When the Healthcare Professional generates a letter using this
template during the patient consult, a form is presented for completing
any user-defined fields found on the letter, as shown below. The
letter also indicates that the values are either from Helix data
fields or user-defined fields via their colour coding.
For more information in using templates in Letter Writer click here .
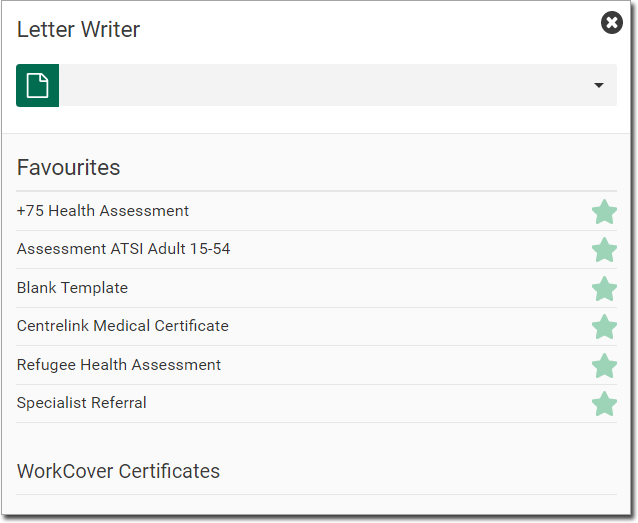
Template Favourites
When creating a letter based
on a template, you have the opportunity to flag the template as
a favourite, by clicking ![]() This icon acts as
an on/off toggle.
This icon acts as
an on/off toggle.
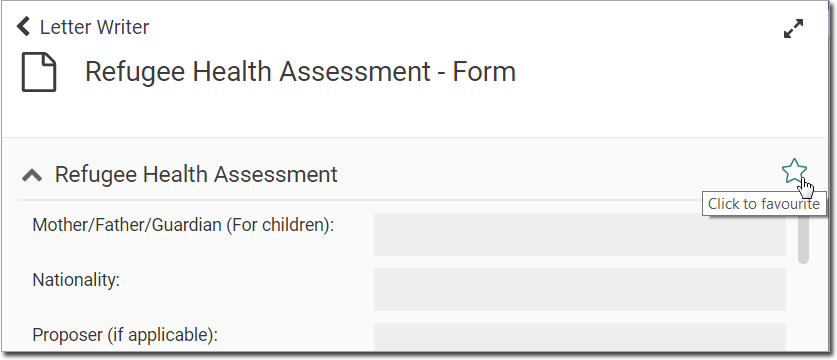
When you next go to create a new letter, the favourite will appear in your favourites list.
Delete a Template
1. Locate
the template you wish to delete.
2. Click
![]() associated with the template.
Deleting the template will
remove it permanently.
associated with the template.
Deleting the template will
remove it permanently.
3. You will be prompted to confirm this action.
Download a Template
1. Locate
the template you wish to download.
2. Click
![]() associated with the template.
associated with the template.
3. The template gets downloaded to the Downloads folder.
o Note : The downloaded file will be in a .JSON Format. This file cannot be edited. However, it can be modified by uploading it into the template editor by using the upload option while creating it.